Ever found yourself knee-deep in a project, juggling multiple tasks, and wishing for a way to break them down into more manageable chunks? This is where Jira subtasks come in handy.
They are like the secret sauce of efficient task management, helping your team tackle complex work item by item. Let’s explore everything you need to know about using Jira subtasks like a pro.
What are Jira subtasks?
Jira subtasks are smaller tasks that make up a larger user story or parent issue. They allow you to break down complex issues into smaller, more manageable pieces of work. Subtasks are linked directly to the parent issue, allowing you to view and track progress on both the overall issue and its constituent subtasks.
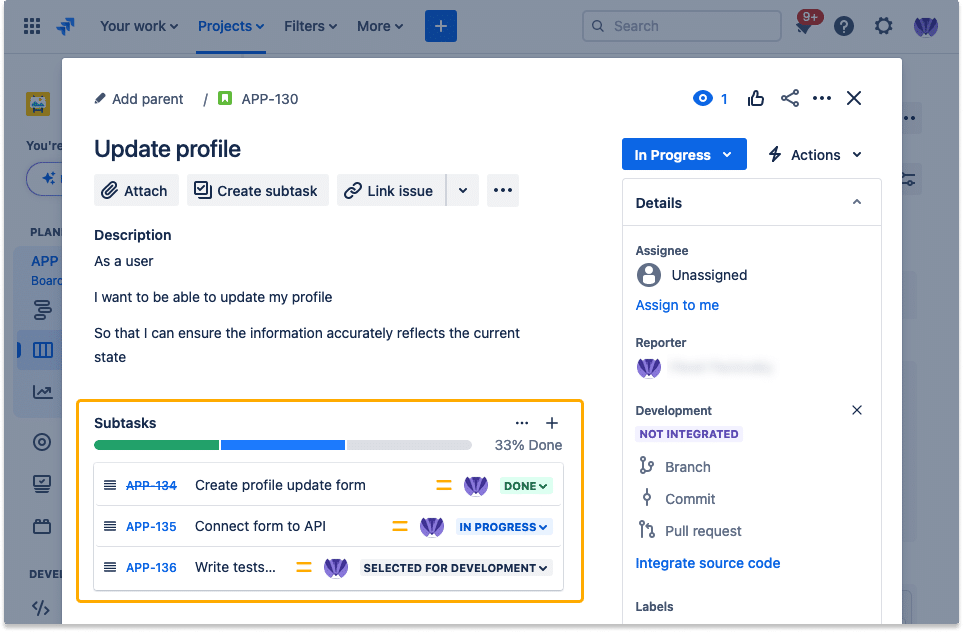
For example, if your user story is “As a user, I want to be able to update my profile,” you could create subtasks like “Create profile update form,” “Connect form to API,” “Write tests for profile update,” etc. The subtasks would roll up under the overall user story issue.
So, when it comes to Jira task vs subtask, the key difference between them is their relationship to parent issues. While tasks can be independent to-dos within a project, subtasks must be linked to a parent task or user story.
When to use Jira subtasks
Jira subtasks are useful in the following situations:
- For complex issues and user stories that require multiple steps to complete.
- When different team members need to work on different parts of the same parent issue.
- To track progress on the subparts of bigger issues.
- For collaborative efforts that involve handoffs.
- When you need to track which subparts are blocking progress.
- For decomposing Epics into smaller pieces.
The key is using subtasks whenever the work requires breaking a large issue down into smaller segments that can be assigned, tracked, and executed separately.
How to Create Jira Subtasks
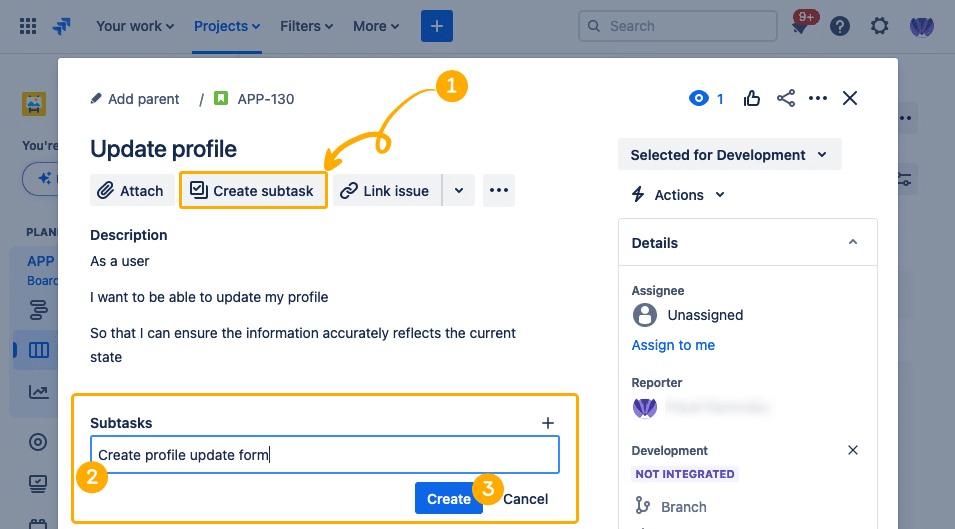
- Navigate to the parent issue you want to break down and click Create Subtask or Add a child issue option beneath the issue title.
- Give the subtask a descriptive summary and add details to the description field. The summary should be short but specific.
- Assign the subtask to the team member who will be responsible for completing the work. The subtask should have a single assignee.
- Set the priority, due date, labels, or any other fields you need for the subtask. You can manage subtask fields the same as regular issues.
- Click Create and the new subtask will be linked under its parent issue.
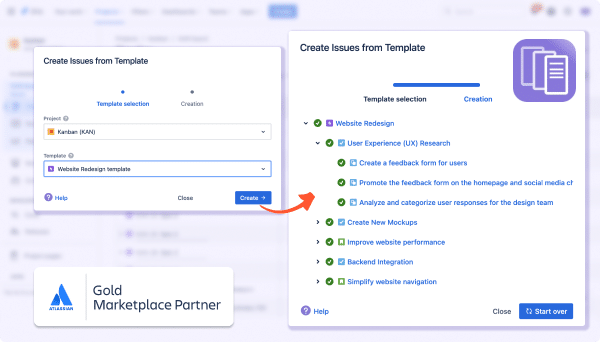
Boost your teams’ efficiency
Maximize your team’s productivity by easily duplicating your epics, tasks and stories with “Easy Issue Templates for Jira Issues”
Tips for managing subtasks
Here are some tips for effectively managing subtasks in Jira:
- Set due dates for individual subtasks to keep them on track. Due dates will roll up and indicate if the parent issue is at risk.
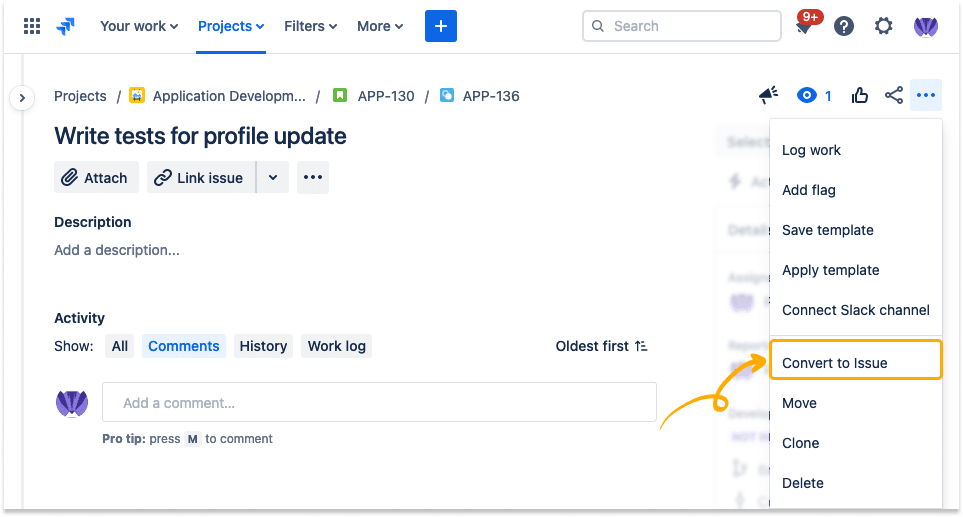
- If priorities change, you can change a Jira subtask to a standalone task by selecting the Convert to Issue or Move option in the ⋯ menu.
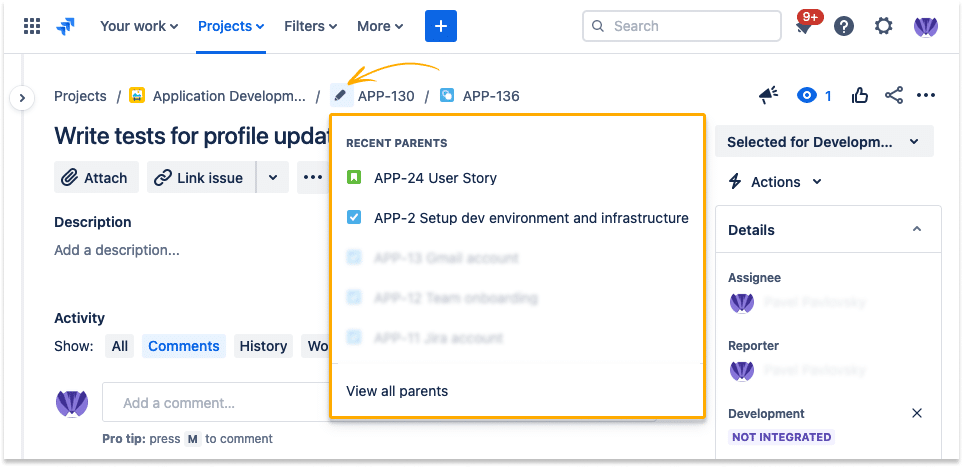
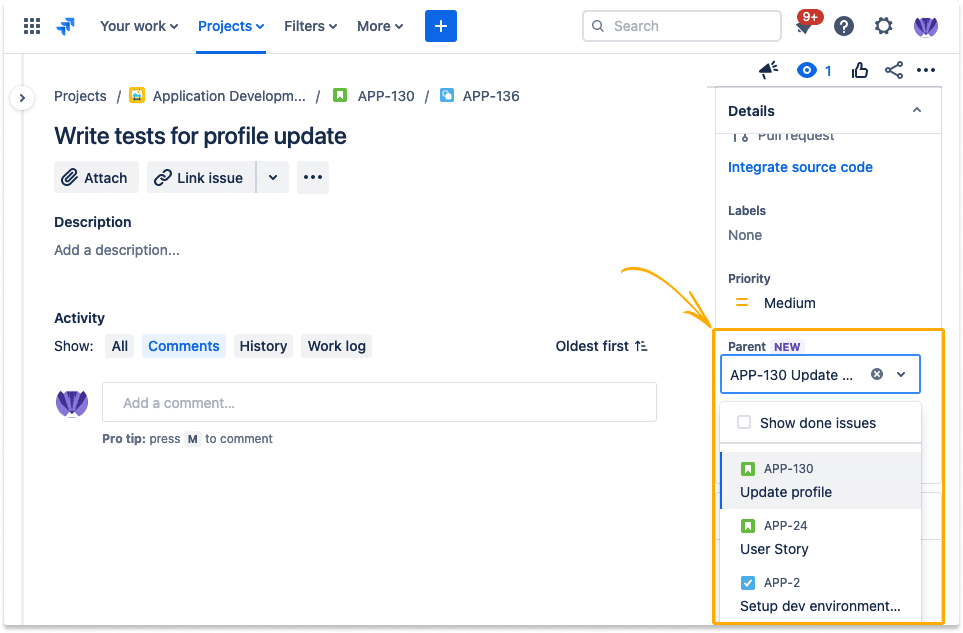
- To move a Jira subtask to another user story or parent issue, open the subtask and change the Parent Link field to point to the new parent issue.
OR
- Check subtask status often and update them as work progresses. This will keep the progress bar on the parent issue up-to-date.
- Review all subtasks under a parent issue on its issue view page for a high-level snapshot.
Best practices for using Jira subtasks
- Keep subtasks small (they can be completed in 1-2 days of focused work). Overly large subtasks lose their tracking value.
- Name subtasks clearly and consistently based on the work they represent. This helps assignees understand the scope.
- Use subtasks for tracking work only rather than organizational purposes. Subtasks aren’t categories.
- Update subtask status frequently as work is done. Don’t leave them stagnant.
- Complete subtasks before closing parent issues for accurate progress tracking.
Bringing it all together
Jira subtasks are invaluable for breaking complex issues down into smaller pieces of work. They bring order and clarity to large initiatives by enabling detailed tracking and assignment.
Now when you know the basics of using Jira subtasks — their benefits, when to use them, how to create and manage them — you can start leveraging them for your next big project. Implementing subtasks with the best practices above will help you gain control over unwieldy issues. Your team will be able to collaborate smoothly and deliver work efficiently.
